Cloudflare R2 is a zero egress fee object storage which is compatible with the S3 API. This means you aren't at risk of vendor lock-in and can swap to another provider at any time.

But why should you use Cloudflare R2?
There are a few solutions out there from Amazon S3 to Digital Ocean's Spaces each with their own trade-offs. Cloudflare R2 is one of the newer S3 alternatives on the block, offering zero egress fees and a generous 10GB of storage for free.
It's a great solution for getting started and even more so if you're already managing your domains with Cloudflare.
While R2 aims to be compatible with S3, not everything is supported. To see what's supported, check out the R2 documentation for a full list.

Let's explore how we can use Cloudflare R2 with Laravel.
Setting Up Our Laravel Project
I'm going to assume you have a Laravel project ready to go. If not, go ahead and get one set up.
Then once you're ready, let's install the S3 Flysystem Adapter into our project:
$ composer require league/flysystem-aws-s3-v3:^3.0If you are wondering why we're installing an S3 package. Remember, Cloudflare R2 is compatible with the S3 API.
Creating a Cloudflare R2 Bucket
What you need to do next is create a Cloudflare R2 bucket so that we have somewhere to store our files.
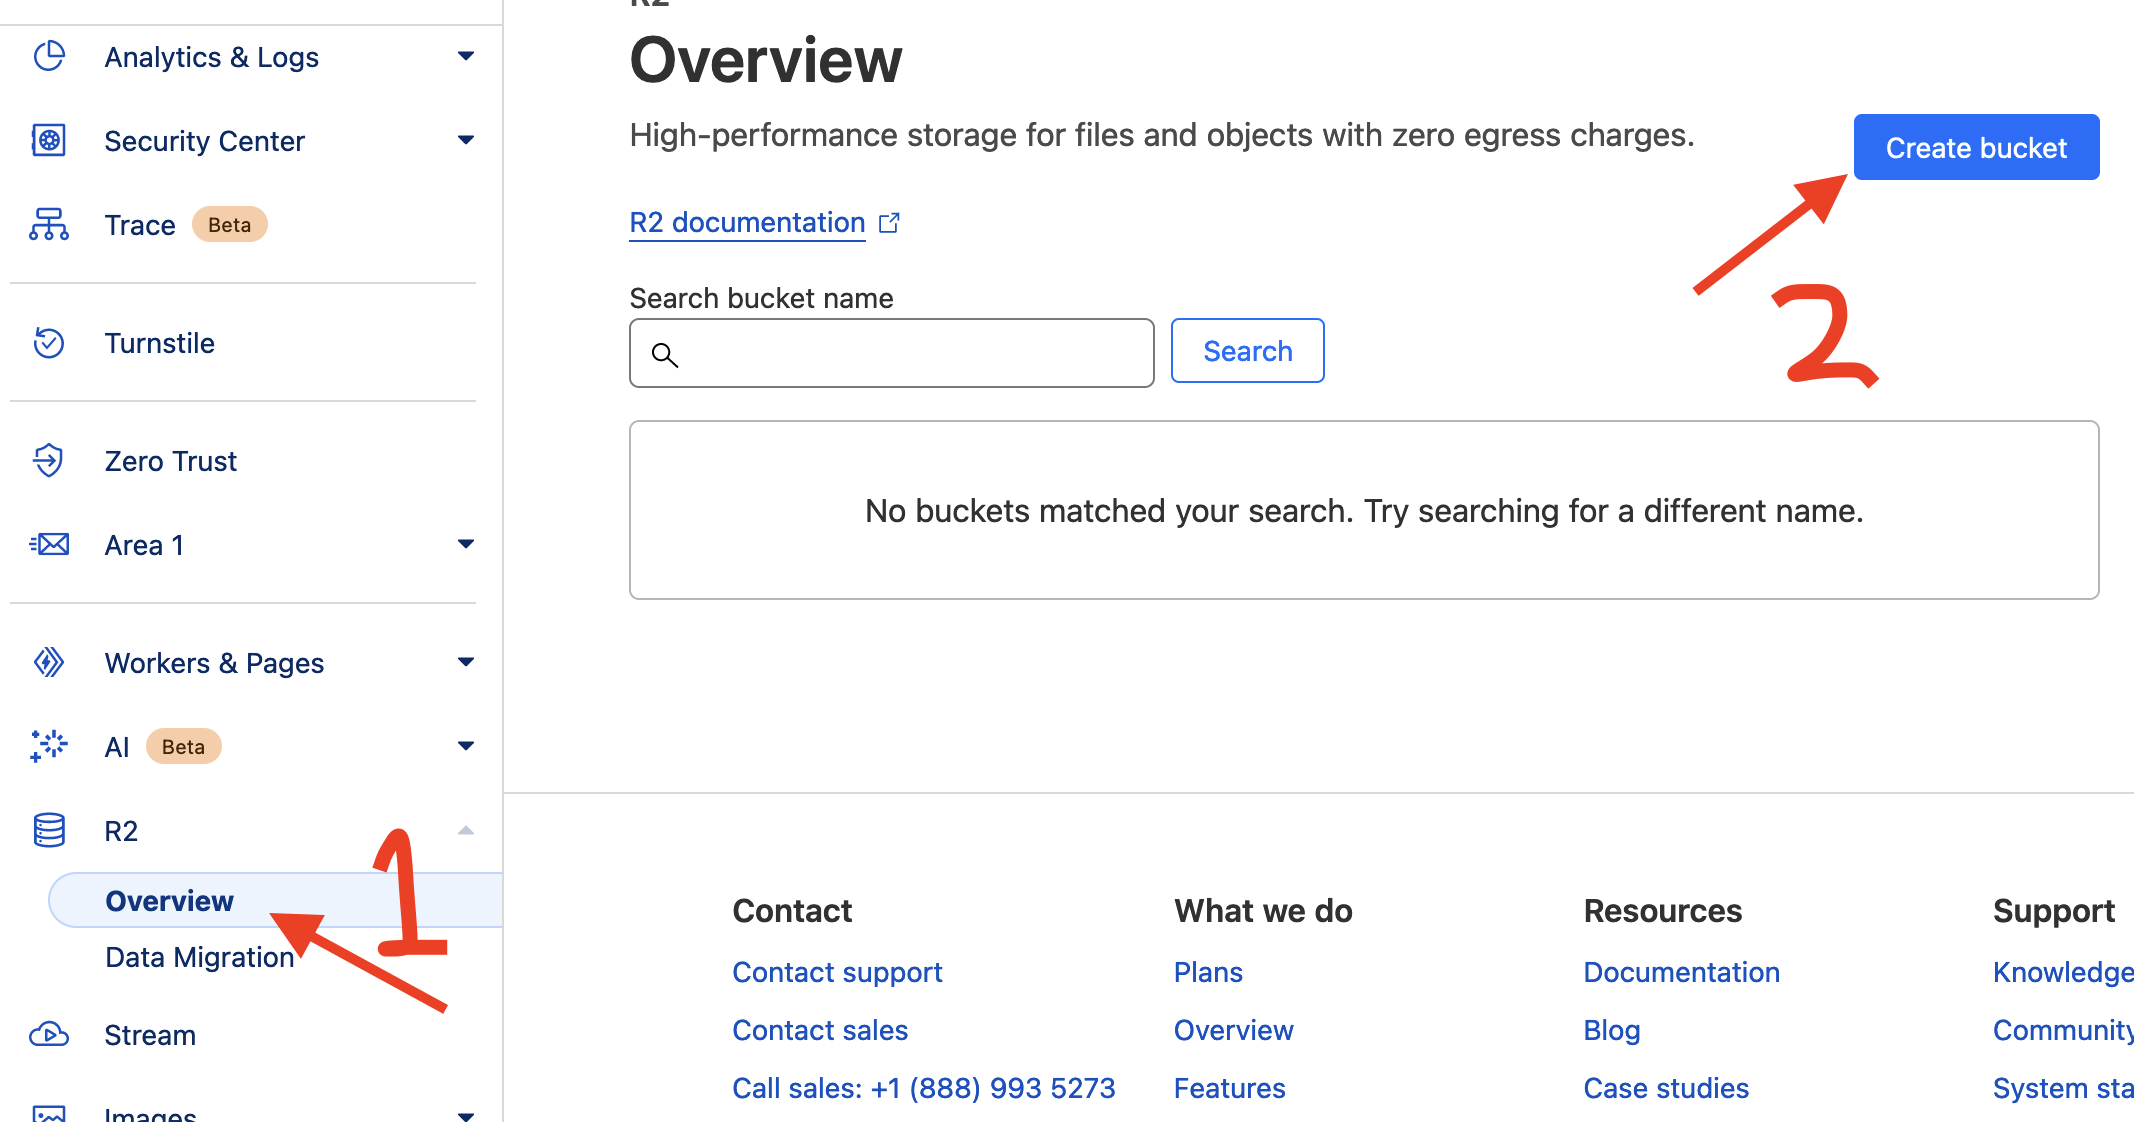
Open up your Cloudflare account and navigate to the R2 overview page. Here you'll see a button for creating a new bucket, go ahead and click that.
Next, fill in the name of your bucket. The location can be left as auto unless you want to restrict it to be inside the EU.
Generating R2 Credentials
Now we have a bucket created, we'll need to generate some credentials so we can begin storing files from our Laravel application.
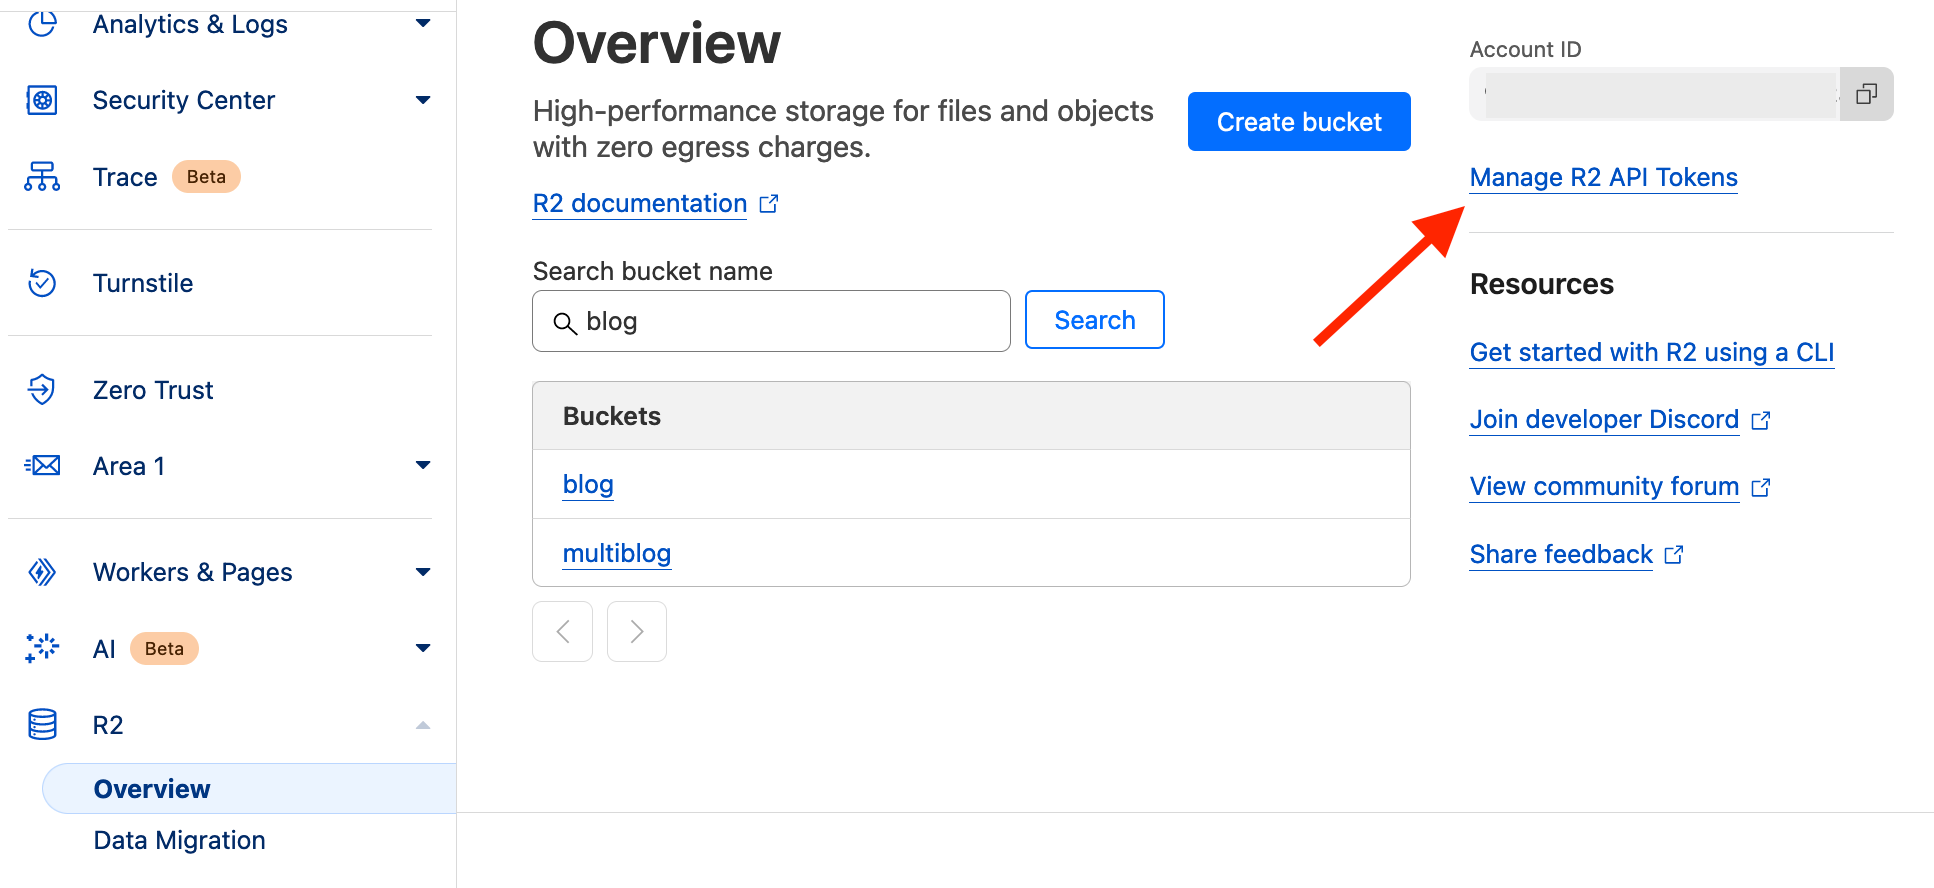
Head back to the R2 Overview page and find the link to "Manage R2 API Tokens" on the right side of the page.
This will take you to a page of all your tokens with an additional button to "Create API Token".
Give your token a name so that you can recall what the token is for. And as for the permission make sure to only apply the permissions you need. If all you're doing is uploading and fetching objects then Object Read & Write is enough.
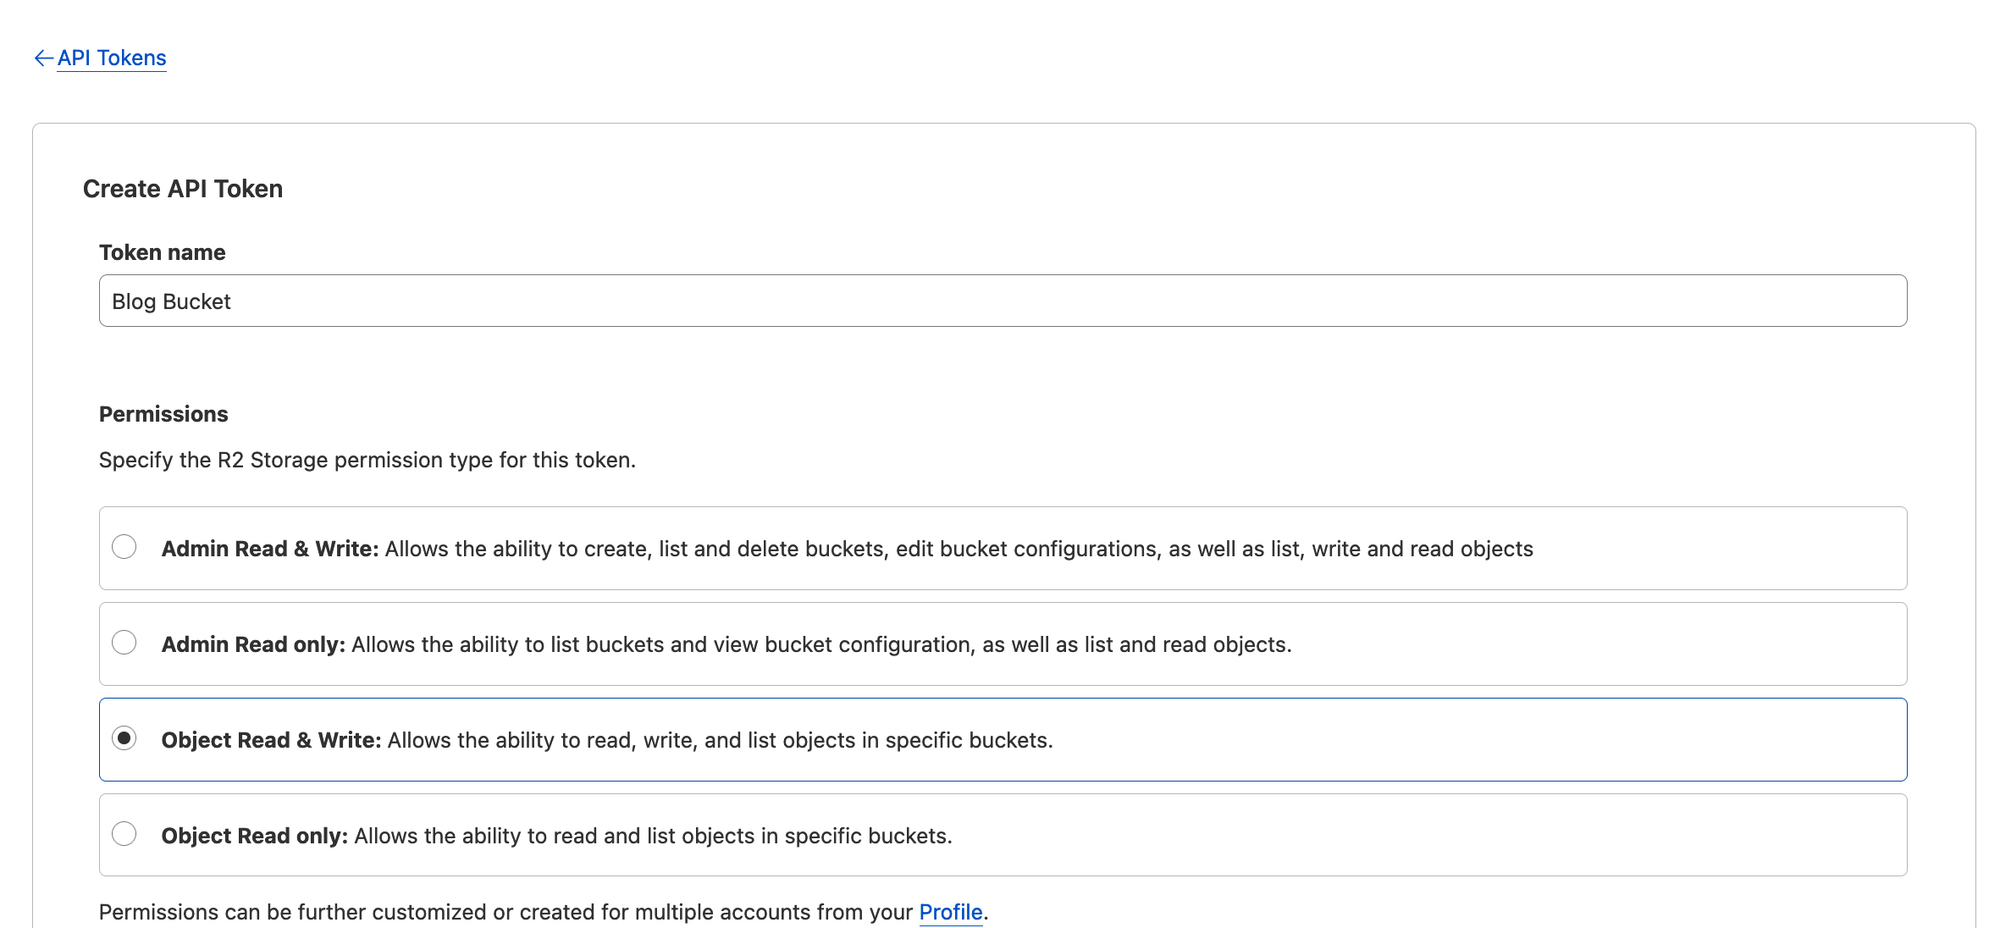
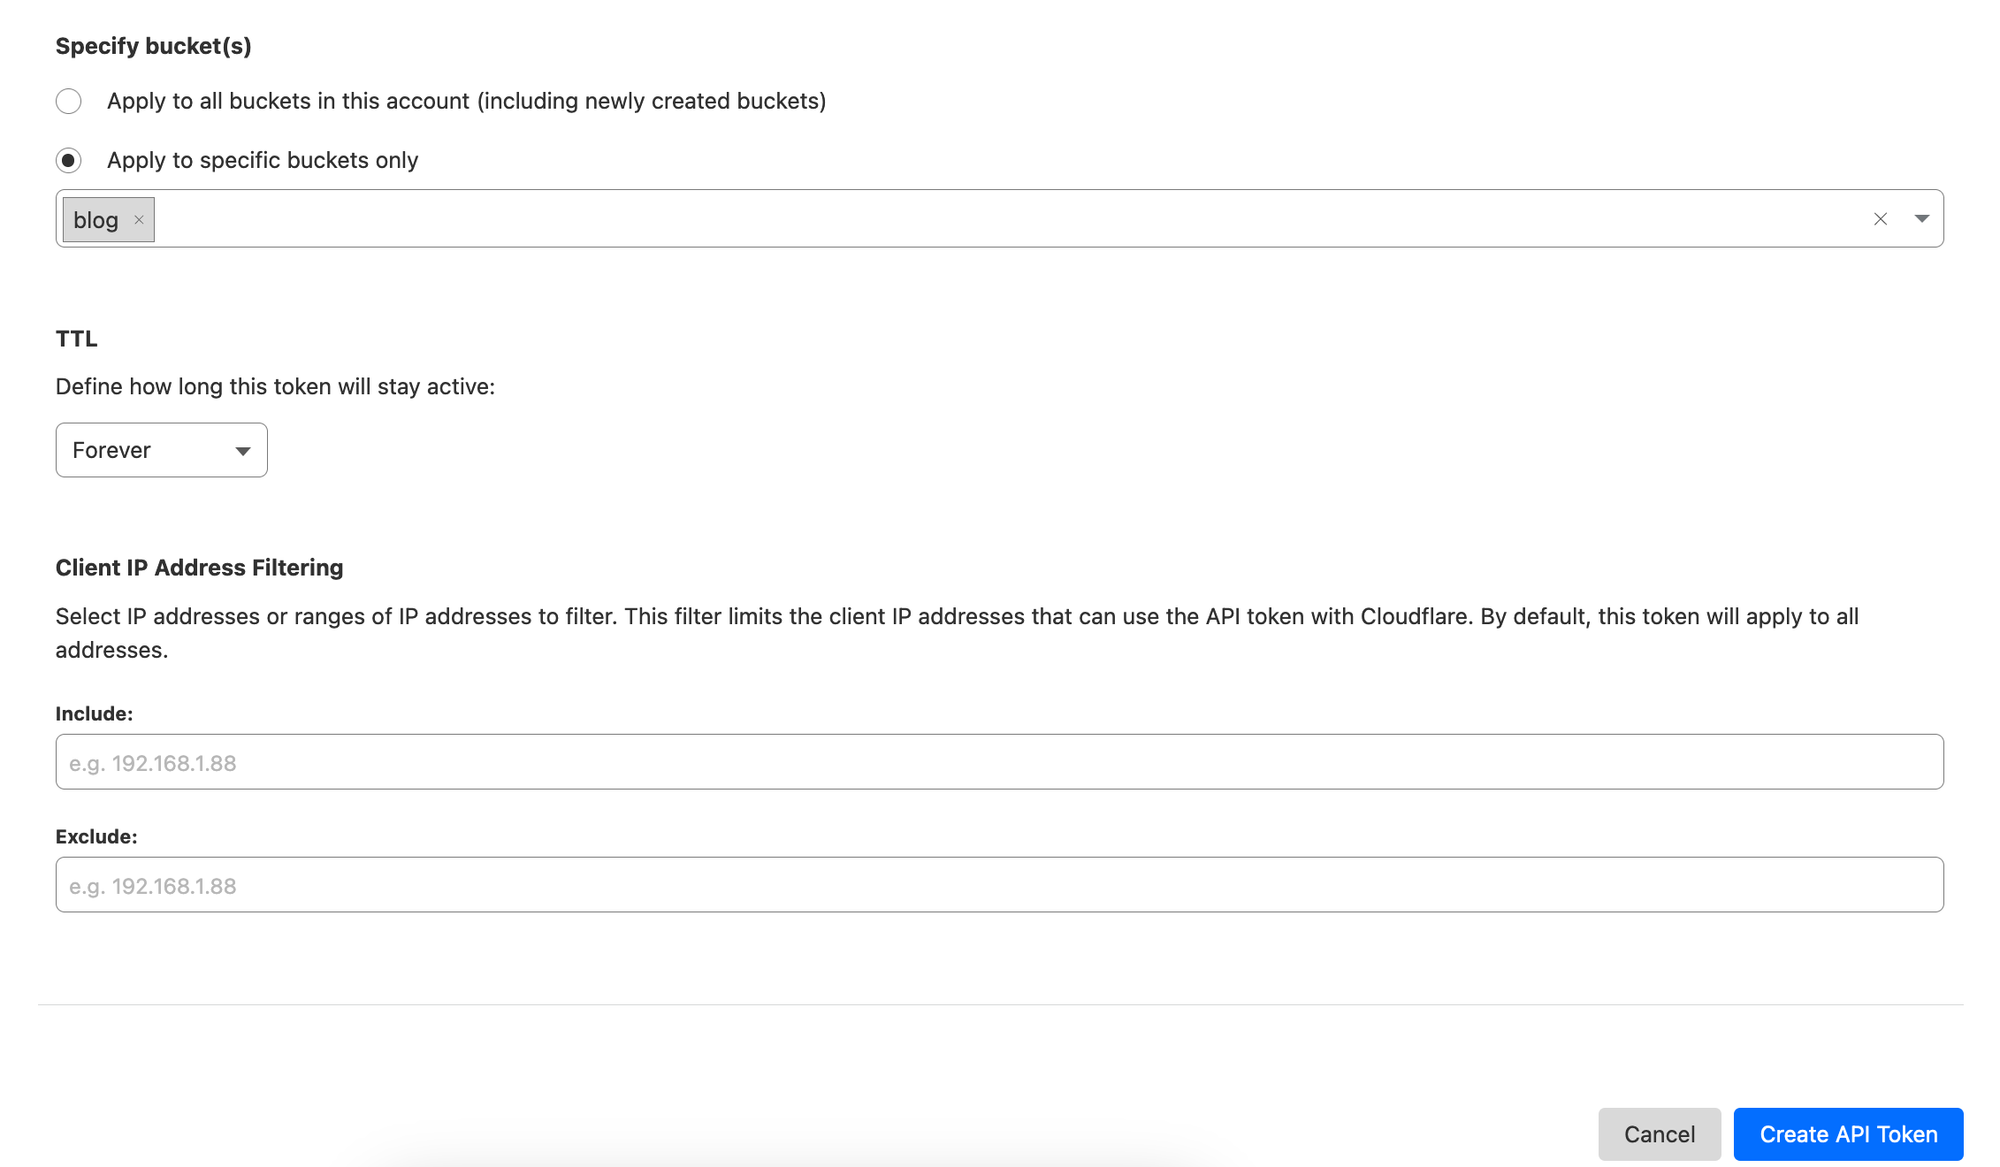
It's also a good security practice to use one token per bucket. So be sure to lock the token to the bucket you created earlier. This limits the damage to the specific buckets should somebody manage to hijack your token.
TTL determines how long your token will last until it expires. You can make the token expire after 24 hours or several months, but unless you want to rotate keys out regularly then Forever is fine.
Finally, the Client IP Address Filtering lets you restrict the token to specific IP addresses. If you're security conscious and your servers have static IP addresses, then feel free to set this. But for testing it's fine to leave blank.
After creating your token you will be taken to a page with several keys. The keys we're interested in are the Access Key and Secret Access Key.
Configuring Laravel For Cloudflare R2
Open up the .env file in your Laravel application and we're now ready to wire up the credentials.
Take the Access Key and Secret Access Key from the step above and copy them into the AWS_ACCESS_KEY_ID and AWS_SECRET_ACCESS_KEY respectively.
AWS_ACCESS_KEY_ID=""
AWS_SECRET_ACCESS_KEY=""
Set the AWS_BUCKET to the name of your bucket and leave the AWS_DEFAULT_REGION as us-east-1. R2 does not use the region value and will figure this out automatically if blank or left as us-east-1.
AWS_DEFAULT_REGION=us-east-1
AWS_BUCKET=blog
Now there are two AWS values left to configure. The AWS_URL and AWS_ENDPOINT.
The AWS_ENDPOINT is in the following format:
https://{account_id}.r2.cloudflarestorage.comYou can find this in your bucket's setting page for reference, so you can copy that. Just be sure to chop off the end of the URL where it adds your bucket's name.
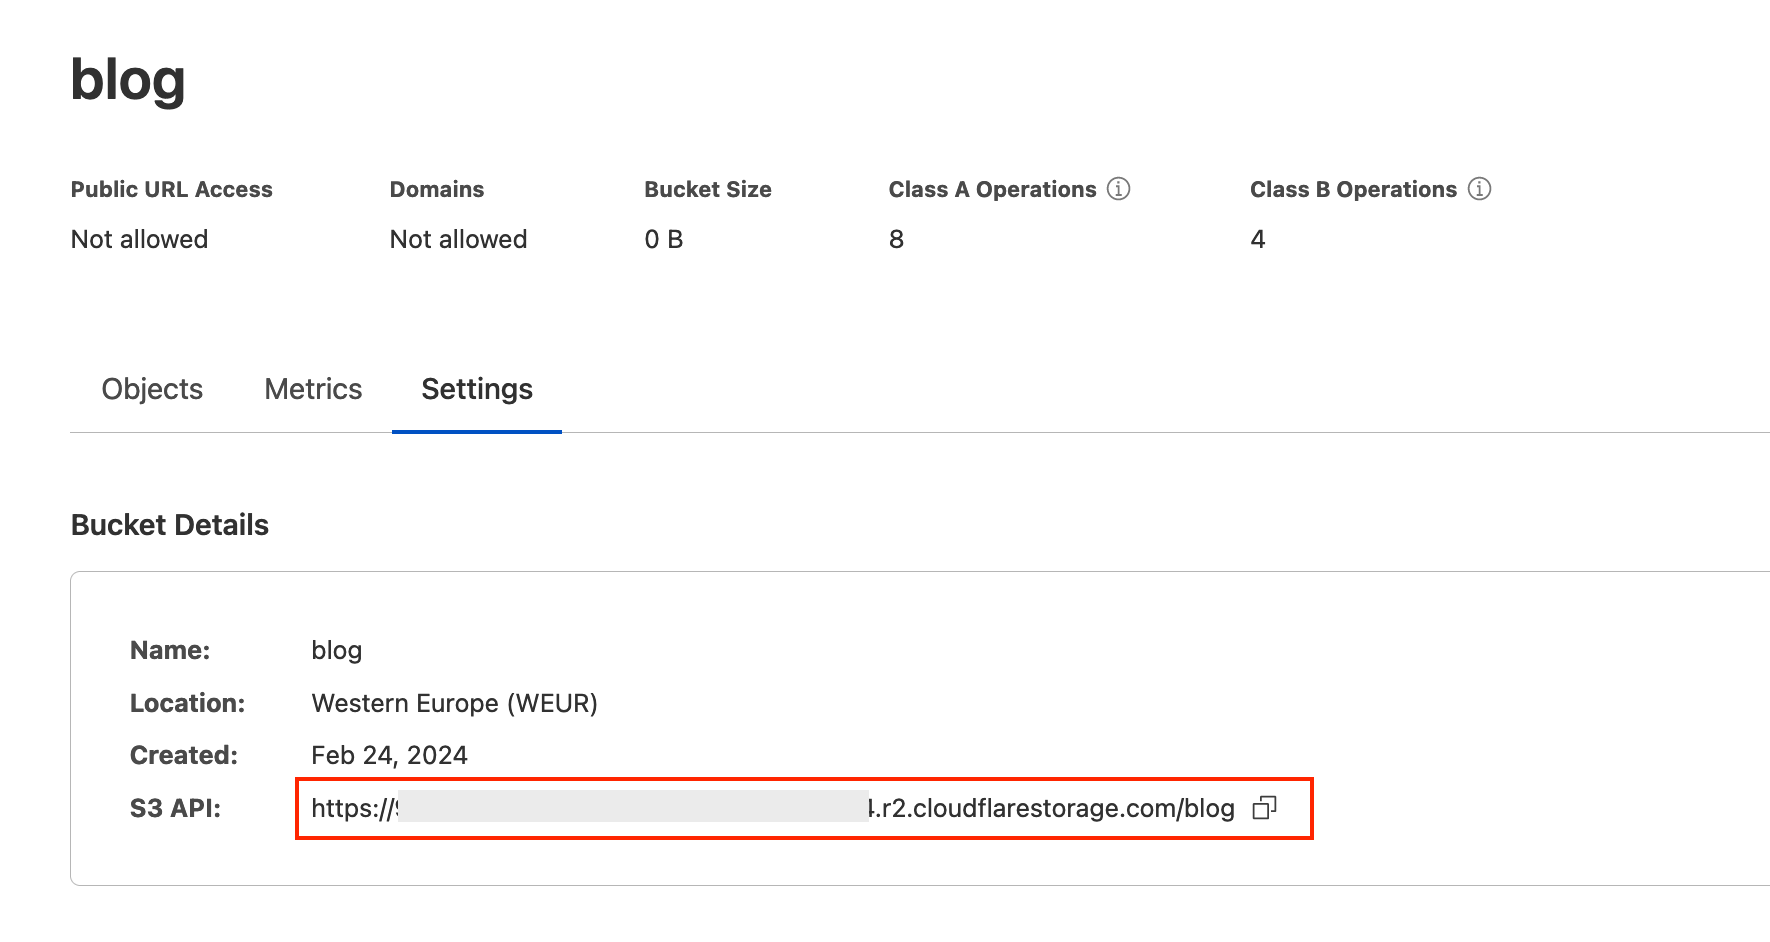
AWS_ENDPOINT="https://***.r2.cloudflarestorage.com"The value of the AWS_URL depends on how you set up public access. You can either use a public R2 subdomain provided by Cloudflare or use your own domain.
For the sake of testing I'll use the R2.dev Bucket URL. If you replicate this step, make sure to allow access.
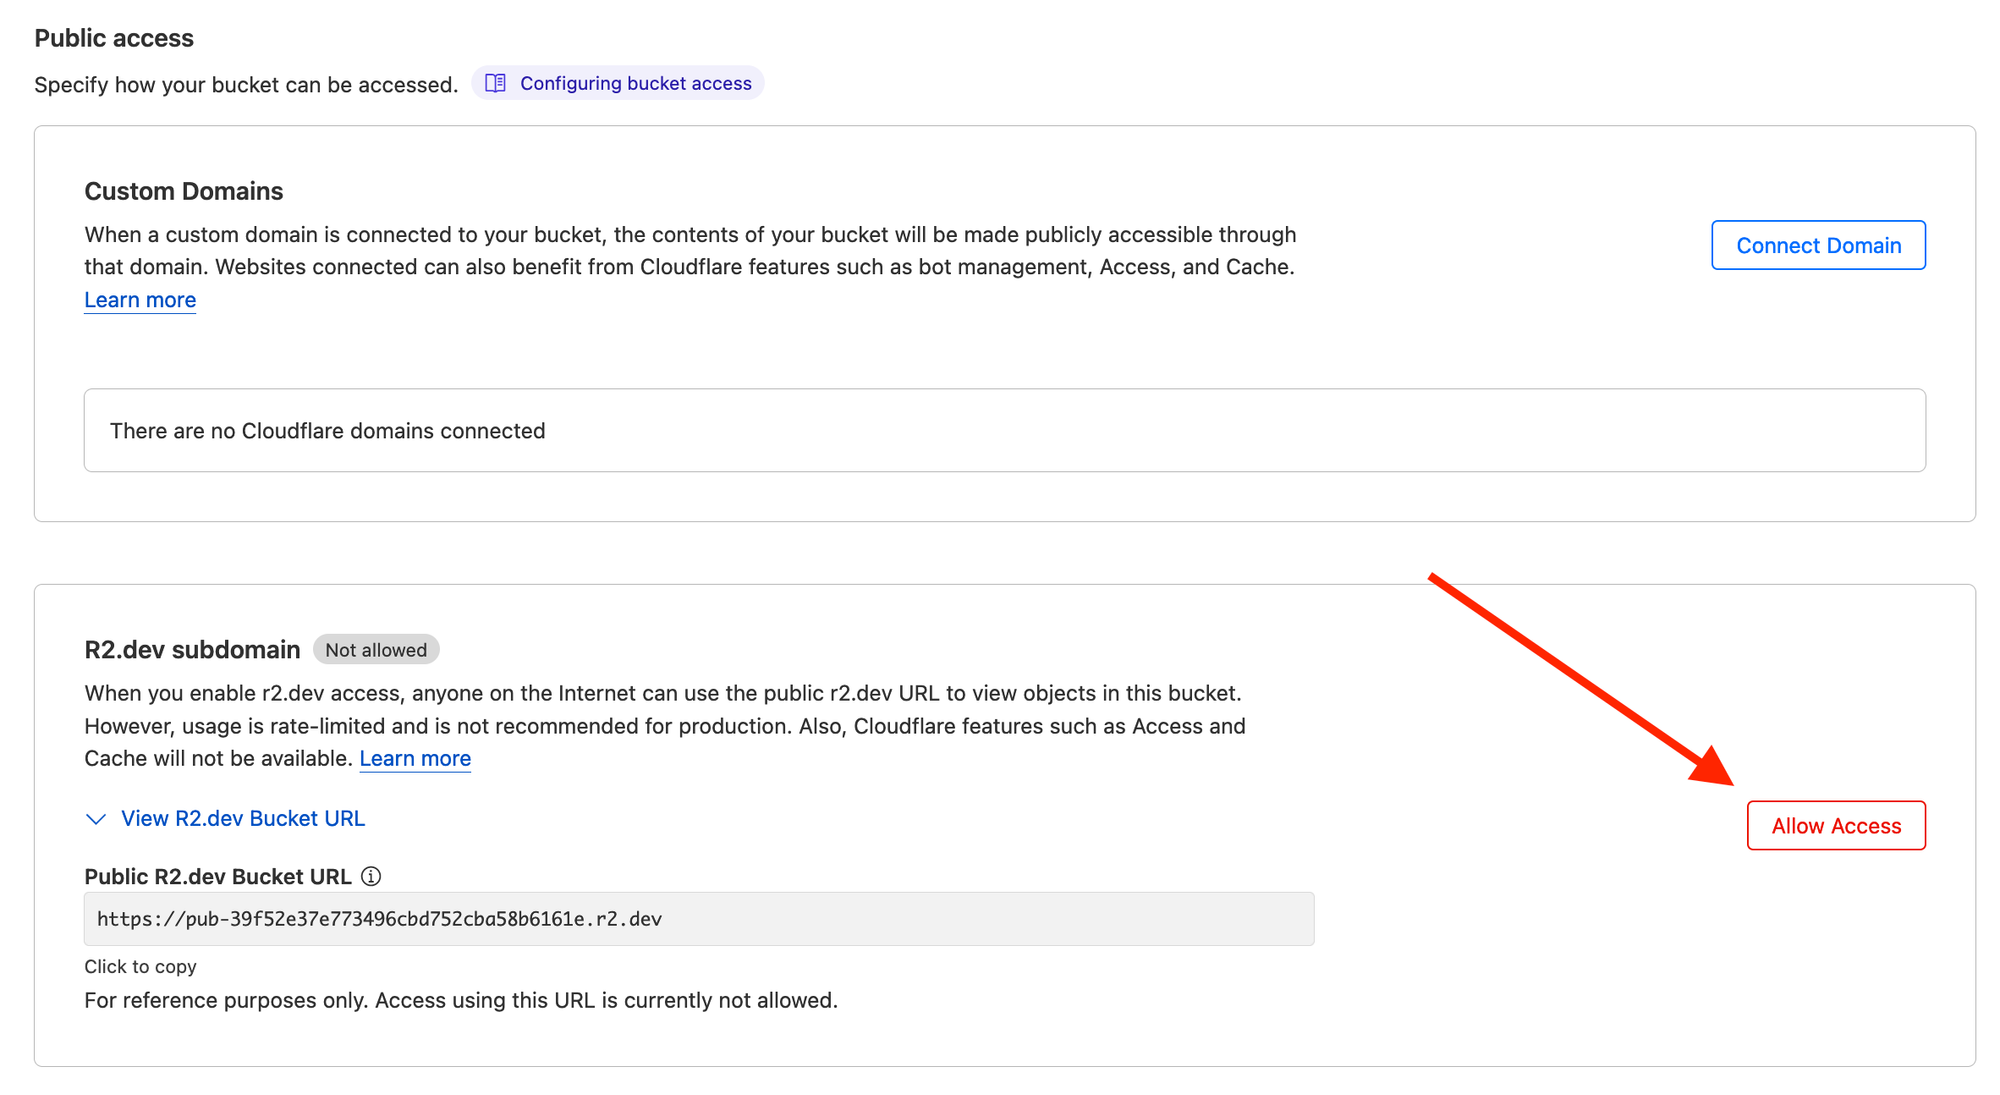
Then take the public URL and paste it into the AWS_URL value in your .env:
AWS_URL="https://pub-39f52e37e773496cbd752cba58b6161e.r2.dev"Uploading Files to Cloudflare R2 With Laravel
Once everything is configured, all you need to do is upload a file as you would normally but specify S3 as the disk.
use Illuminate\Support\Facades\Storage;

...

Storage::disk('s3')->putFile(
    'uploads',
    $request->file('upload'),
);
FileUploadController.php
The above will drop the file into a folder called uploads in your Cloudflare R2 bucket.
Should you want to read more about handling file uploads in Laravel, check out below:
 Harry
Harry