Do you ever set out with a no-frills Laravel project, and swear by the bare minimum? No unnecessary dependencies - just Blade and HTML? But then you want a little bit of JavaScript on a page, and so you import Vue. But then you need a nice multi-select component, a datepicker, something else... and damnit, you've got a pseudo-SPA encased in Blade again?
Inertia.js doesn't aim to solve this problem, actually. It embraces it. Providing a glue that binds the frontend and backend together as a single monolith.
In this tutorial, we'll go over spinning up a simple Laravel application, setting up Inertia.JS and making our way through a simple todo application.
What is Inertia.js
Inertia is a new approach to building classic server-driven web apps. We call it the modern monolith.
Inertia is a library that binds two frameworks together. Removing much of the frustration that backend and frontend separation can cause.
First-party support is centred around Laravel as the backend, and Vue/Svelte/React as the frontend. However, there are community adapters that extend this to other frameworks.
To see it in action, check out the official demo project and source code.
Demo: http://demo.inertiajs.com/
Source Code: https://github.com/inertiajs/pingcrm
What Can I Make With Inertia.js?
I find Inertia perfect for building backend systems or websites that don't require SEO. This is because as the frontend is JavaScript, search engines and other tools have difficulty picking up the content of your web page.
Google is an exception, as it does run JavaScript, but others can be hit/miss. It's usually not worth it unless you want to look into server-side rendering. Which Inertia now supports, but comes with further setup demands.
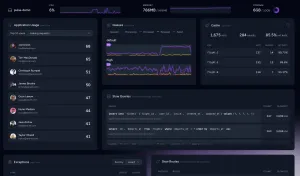
I recently open sourced a self-hostable short URL application that uses Inertia so if you'd like to see a real world example, feel free to check it out!
 Harry
Harry
We'll have a look at making a simple todo app. It'll let us explore the basics of Inertia.js and give you an idea of the things we can create.
Set Up The Laravel Project
A quick foreword, there are official starter kits offered by Laravel that get you up and running with Inertia much quicker. Laravel Breeze / Laravel Jetstream come with installation options to enable Inertia in your project.
If you're looking to continue without using these or prefer to do it manually. Carry on, otherwise, this section can be skipped.
Spin up a new Laravel 10 project (or step over this if you already have a project ready) and set your .env with your DB credentials.
$ laravel new inertia-todolist
$ cd inertia-todolist
Serving your application at this stage will have the Laravel welcome page.
Setting up Inertia.js
Configuring The Server Side
Following the steps laid out by the Inertia documentation.
$ composer require inertiajs/inertia-laravelBefore setting up the Blade file (the first and last time we'll see Blade), let's take the welcome.blade.php file and rename it to app.blade.php. Open it up and replace the contents with the example provided by the Inertia documentation.
<!DOCTYPE html>
<html>
  <head>
    <meta charset="utf-8" />
    <meta name="viewport" content="width=device-width, initial-scale=1.0, maximum-scale=1.0" />
    @vite('resources/js/app.js')
    @inertiaHead
  </head>
  <body>
    @inertia
  </body>
</html>
resources/views/app.blade.php
Next, install the middleware by running:
$ php artisan inertia:middlewareAnd register the middleware in your app/Http/Kernel.php as the last item in the web group:
'web' => [
    \App\Http\Middleware\EncryptCookies::class,
    \Illuminate\Cookie\Middleware\AddQueuedCookiesToResponse::class,
    \Illuminate\Session\Middleware\StartSession::class,
    \Illuminate\View\Middleware\ShareErrorsFromSession::class,
    \App\Http\Middleware\VerifyCsrfToken::class,
    \Illuminate\Routing\Middleware\SubstituteBindings::class,
    \App\Http\Middleware\HandleInertiaRequests::class, // <- Here
],
app/Http/Kernel.php
Configuring The Client Side
For the client side, we'll follow along with Inertia's client-side documentation.
I'll be using yarn as my package manager, but feel free to switch out for npm.
Install the essential packages we need to get Vue to work with Vite.
$ yarn add vue @vitejs/plugin-vueAnd update vite.config.js to include the Vue plugin. This will allow Vite to parse Vue's template syntax.
import { defineConfig } from 'vite';
import laravel from 'laravel-vite-plugin';
import vue from '@vitejs/plugin-vue'; // <!- Don't forget the import

export default defineConfig({
    plugins: [
        laravel({
            input: ['resources/css/app.css', 'resources/js/app.js'],
            refresh: true,
        }),
        vue({
            template: {
                transformAssetUrls: {
                    base: null,
                    includeAbsolute: false,
                },
            },
        }),
    ],
});
Then install the Inertia's client-side adapter for Vue:
$ yarn add @inertiajs/vue3Next, find your resources/js/app.js file and replace the contents with:
import './bootstrap';
import { createApp, h } from 'vue'
import { createInertiaApp } from '@inertiajs/vue3'

createInertiaApp({
    resolve: name => {
        const pages = import.meta.glob('./Pages/**/*.vue', { eager: true })
        return pages[`./Pages/${name}.vue`]
    },
    setup({ el, App, props, plugin }) {
        createApp({ render: () => h(App, props) })
            .use(plugin)
            .mount(el)
    },
})
And finally, fire up Vite to start building our resources - you'll want to keep this running during development.
$ yarn run devProving It All Works
At this point, we have everything we need. So let's give it a quick check to verify it all works.
In your routes/web.php file, update the default route to return an Interia response, with Home as the parameter. (This is the name of the Vue component we want to render)
Route::get('/', function () {
    return \Inertia\Inertia::render('Home');
});
And create the client-side component resources/js/Pages/Home.vue with some Vue template syntax.
<template>
    <p>Hello, from Vue!</p>
</template>
If everything checks out - you'll see the message when you open up your web browser to the served application.

Creating The Todo List
Initial Setup
Now with the setup out of the way, it's time to look at yet more setup. 😀 But this time for the todo list.
For the Todo model, use the following artisan command to create both the model and migration in one command.
$ php artisan make:model -m TodoAlter the created migration with a column for the todo task and a boolean to tick off whether or not the task is done.
Schema::create('todos', function (Blueprint $table) {
    $table->id();
    $table->string('task');
    $table->boolean('is_done')->nullable();
    $table->timestamps();
});
Then for the controllers, let's create the TodoController as a resource controller and a HomeController for the landing page of our app.
$ php artisan make:controller TodoController --resource
$ php artisan make:controller HomeController
Last step: in the web/routes.php file, reference the newly created controllers and as we won't be needing the edit/create, I've opted for an apiResource instead.
<?php

use App\Http\Controllers\HomeController;
use App\Http\Controllers\TodoController;
use Illuminate\Support\Facades\Route;

Route::get('/', [HomeController::class, 'index']);
Route::apiResource('todos', TodoController::class)->except(['index', 'show']);
routes/web.php
Seeding Some Data
Create a seed and factory for our Todo model.
$ php artisan make:seed TodoSeeder
$ php artisan make:factory TodoFactory
Make the following modifications to call the TodoSeeder and create 10 Todo models with some fake data as defined by the factory.
public function run(): void
{
    $this->call(TodoSeeder::class);
}
database/seeders/DatabaseSeeder.php
public function run(): void
{
    Todo::factory(10)->create();
}
database/seeders/TodoSeeder.php
public function definition(): array
{
    return [
        'task' => $this->faker->words(random_int(5, 10), true),
        'is_done' => $this->faker->boolean(25),
    ];
}
database/factories/TodoFactory.php
Kick it all into gear by migrating and running the seed.
$ php artisan migrate:fresh --seedHooking Up the Landing Page
Up to this point, it's all been around setting up this and that. I'm happy to say we're moving on a little here.
Let's go ahead and start rendering the landing page which will display the todo list.
In the newly created HomeController, implement the index method to return an Inertia response. Parameters can be passed in a similar fashion as regular view parameters. The client-side will accept these as props (in Vue's terminology) when we come to rendering the page component.
public function index()
{
    return Inertia::render('Home', [
    	'todos' => Todo::latest()->get(),
    ]);
}
app/Http/Controllers/HomeController.php
Moving to the client-side, in the Home component. I've made a wrapper that breaks off each Todo into its own child component.
<template>
    <div class="mx-auto max-w-3xl mt-10 px-4">
        <h1 class="font-light text-3xl">My Todo List</h1>

        <div class="flex flex-col space-y-4 mt-5">
            <Todo
                v-for="todo in todos"
                :key="todo.id"
                :todo="todo"
            />
        </div>
    </div>
</template>

<script setup>
    import Todo from "../Components/Todo.vue";

    defineProps([
        'todos',
    ]);
</script>
resources/js/Pages/Home.vue
And the code for the Todo component looks as so:
<template>
    <div class="bg-gray-100 py-2 px-4 rounded flex flex-row space-x-4">
        <input type="checkbox" />

        <p>{{ todo.task }}</p>
    </div>
</template>


<script setup>
    defineProps([
        'todo',
    ]);
</script>
resources/js/Components/Todo.vue
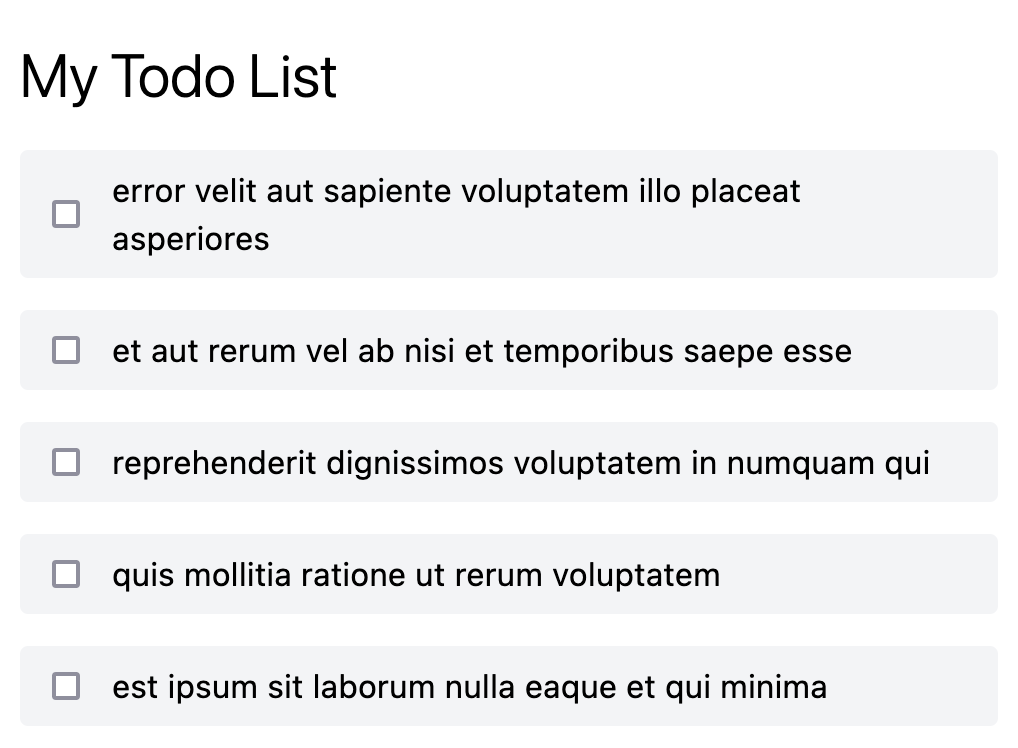
If you haven't already, run the migration/seeders here or enter some data in the database manually if you prefer. If everything is okay, you should see something resembling a todo list in your browser.
Adding New Todos To The Database
To keep our store logic contained, go ahead and create a new component in resources/js/Components called AddTodoForm.vue.
Inertia offers a form helper (useForm) that makes dealing with forms and submitting data really simple. The code below makes use of this to initialise the data, map properties to an input field, and finally submit that to the server.
<template>
    <form
        @submit.prevent="createTodo"
        class="border flex space-x-4 p-4 rounded"
    >
        <div class="flex-1">
            <input
                class="block px-2 py-1.5 bg-gray-100 rounded w-full"
                placeholder="Enter your task..."
                type="text"
                v-model="todoForm.task"
            />
        </div>

        <div>
            <button class="px-6 py-1.5 bg-indigo-600 rounded text-white">
                Add
            </button>
        </div>
    </form>
</template>

<script setup>
    // Import the useForm helper
    import { useForm } from "@inertiajs/vue3";

    // Initialise the form with the properties we want to update client-side send to the server-side
    const todoForm = useForm({
        task: '',
    });

    // Create a method that tells the form to submit to TodoController@store
    const createTodo = () => {
        todoForm.post('/todos');
    };
</script>
resources/js/Components/AddTodoForm.vue
Go ahead and import this component inside the Home component, above the Todo list.
<template>
	...

    <div class="flex flex-col space-y-4 mt-5">
        <AddTodoForm />

        <Todo
            v-for="todo in todos"
            :key="todo.id"
            :todo="todo"
        />
    </div>
</template>

<script setup>
    import AddTodoForm from "../Components/AddTodoForm.vue";
    ...
</script>
resources/js/Pages/Home.vue
Before giving this a spin, we also need to instruct the TodoController on the server-side to handle the request and create our Todo model.
public function store(Request $request)
{
    Todo::create([
        'task' => $request->input('task'),
    ]);

    return redirect()->to('/');
}
app/Http/Controllers/TodoController.php
Don't forget to set the fields as fillable on the Todo model.
protected $fillable = [
    'task',
    'is_done'
];
app/Models/Todo.php
Taking this for a spin in the browser. Let's examine what's going on here.
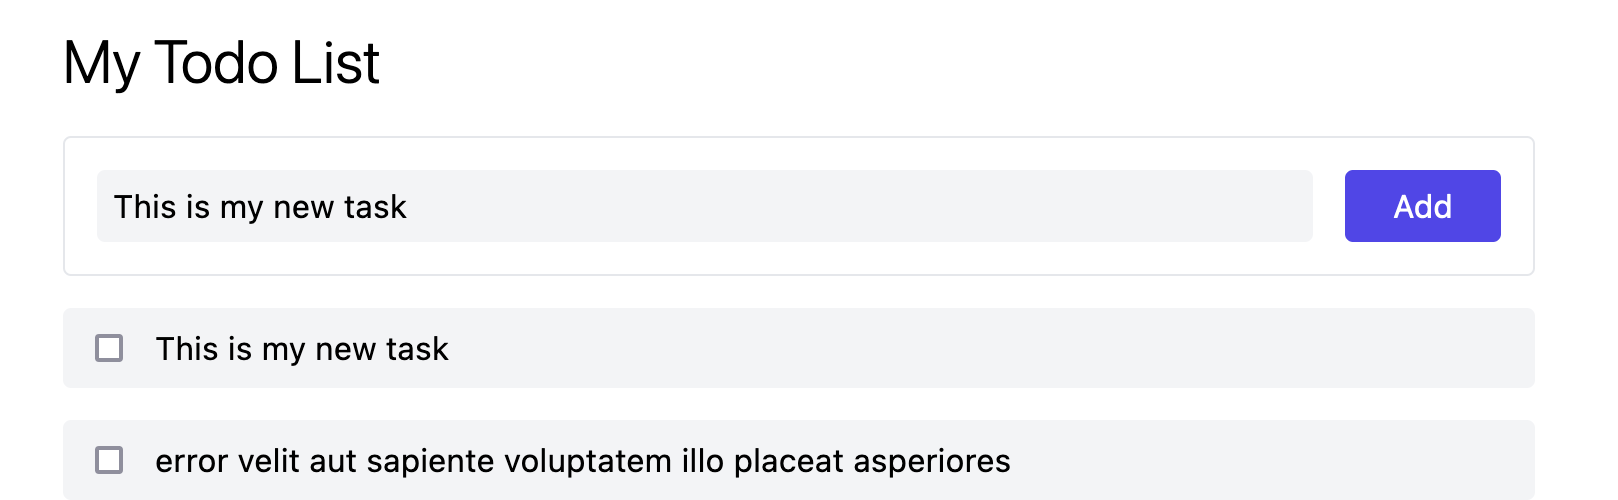
Typing into the input box the details of my task and clicking add, created a new Todo underneath. But in our controller we had a page redirect - but the page state has updated whilst our input hasn't cleared.
Examining the network tab shows us a redirect occurred, followed by a GET request with the props as defined by the HomeController@index action.
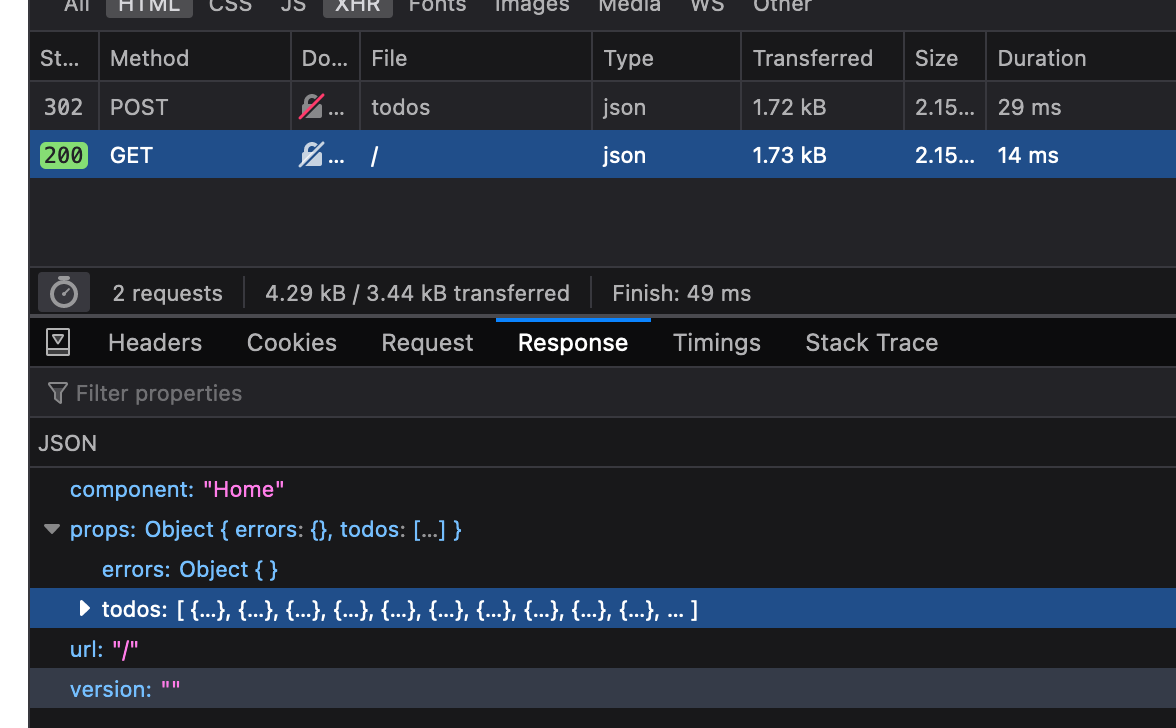
A full page refresh never occurred, like a transitional web request. We're seeing the benefits of a SPA at work within Laravel.
Updating Todos And Checking Done
A todo list isn't so much a todo list if we can't cross them off as complete. Let's see to that now.
In the TodoController, update the update method to bind the $todo model, update its data and then return a redirect.
public function update(Request $request, Todo $todo)
{
    $todo->update([
        'is_done' => $request->boolean('is_done'),
    ]);

    return redirect()->to('/');
}
app/Http/Controllers/TodoController.php
Revisiting the Todo component, requesting it to call save() every time the is_done checkbox is changed.
<template>
    <div class="bg-gray-100 py-2 px-4 rounded flex flex-row space-x-4">
        <input
            type="checkbox"
            :true-value="1"
            v-model="todoForm.is_done"
            @change="save"
        />

        <p>{{ todoForm.task }}</p>
    </div>
</template>


<script setup>
    import { useForm } from "@inertiajs/vue3";

    // This time store a reference to props so we can pull in the defaults in the form
    const props = defineProps([
        'todo',
    ]);

    // Populate form defaults based on the prop data
    const todoForm = useForm({
        is_done: props.todo.is_done,
    });

    // Send an update request for the todo
    const save = () => {
        todoForm.put(`/todos/${ props.todo.id }`);
    };
</script>
resources/js/Components/Todo.vue
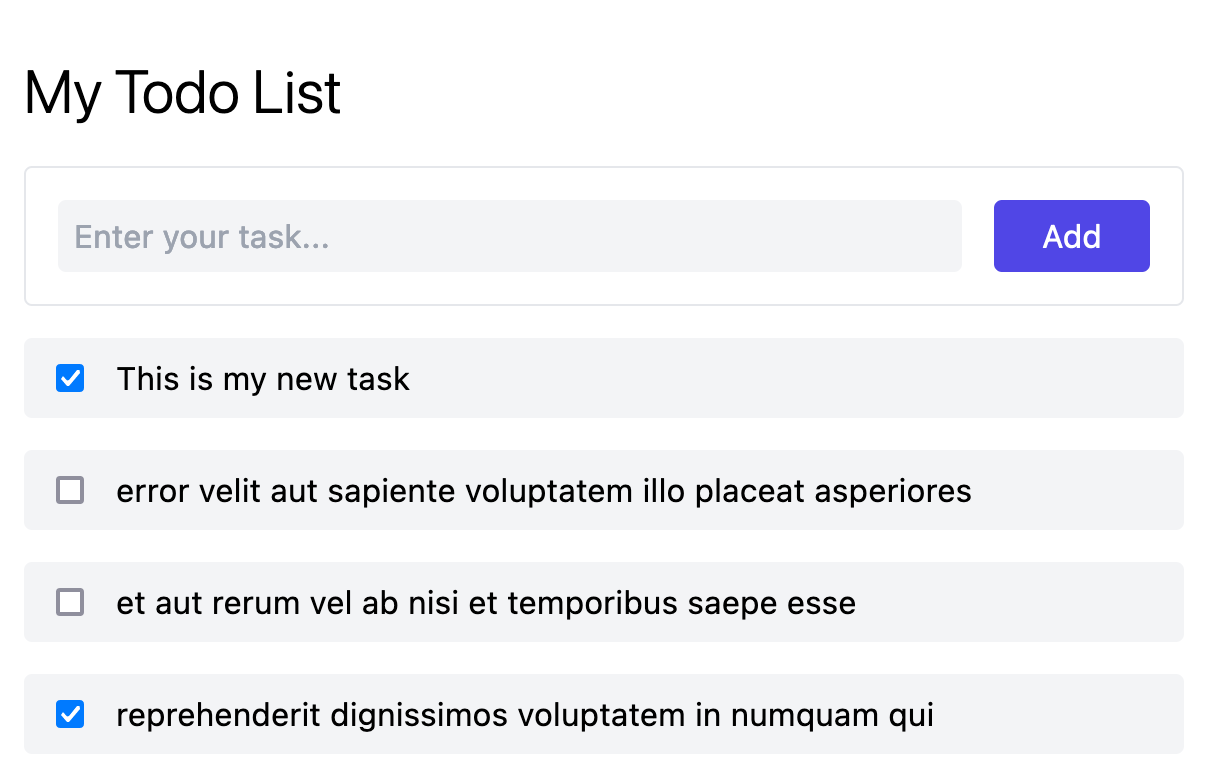
Go ahead and give it a try in the browser. You should be able to check/uncheck todos and refresh the page to see that their state has been saved.
Deleting a Todo Item
Destroy is the last method that needs to be completed in the TodoController. Simply bind the Todo model, call delete, and redirect.
public function destroy(Todo $todo)
{
    $todo->delete();

    return redirect()->to('/');
}
app/Http/Controller/TodoController.php
Followed by adding a delete button and a call via the form helper to hit the delete endpoint on the server-side.
<template>
    <div class="bg-gray-100 py-2 px-4 rounded flex flex-row space-x-4">
        ...
        <button
            type="button"
            @click="deleteTodo"
        >
            X
        </button>
    </div>
</template>

<script setup>
    ...

    const deleteTodo = () => {
        todoForm.delete(`/todos/${ props.todo.id }`);
    }
</script>
resources/js/Components/Todo.vue
And that's all you need.
Adding Request Validation
One thing I left for later was validation. Let's see how Inertia handles it by creating a TodoStoreRequest. and injecting this into the TodoController's store method.
$ php artisan make:request TodoStoreRequestpublic function store(TodoStoreRequest $request)
{
...
}
app/Http/Controllers/TodoController.php
Add some validation to the request, let's say the task is a required field and must be at least 2 characters long.
class TodoStoreRequest extends FormRequest
{
    public function rules(): array
    {
        return [
            'task' => 'required|min:2',
        ];
    }
}
app/Http/Requests/TodoStoreRequest.php
Jumping to the browser and attempting to add a todo with < 2 characters will now, cause nothing to happen... That's because we're missing some feedback so let's add some.
We can check if there are any validation errors on the form helper through its errors property. If we find an error - let's show it. Add the following below the input field in the addTodoForm component.
...
<small
v-if="todoForm.errors['task']"
class="text-red-500 mt-2 block"
>
{{ todoForm.errors['task']}}
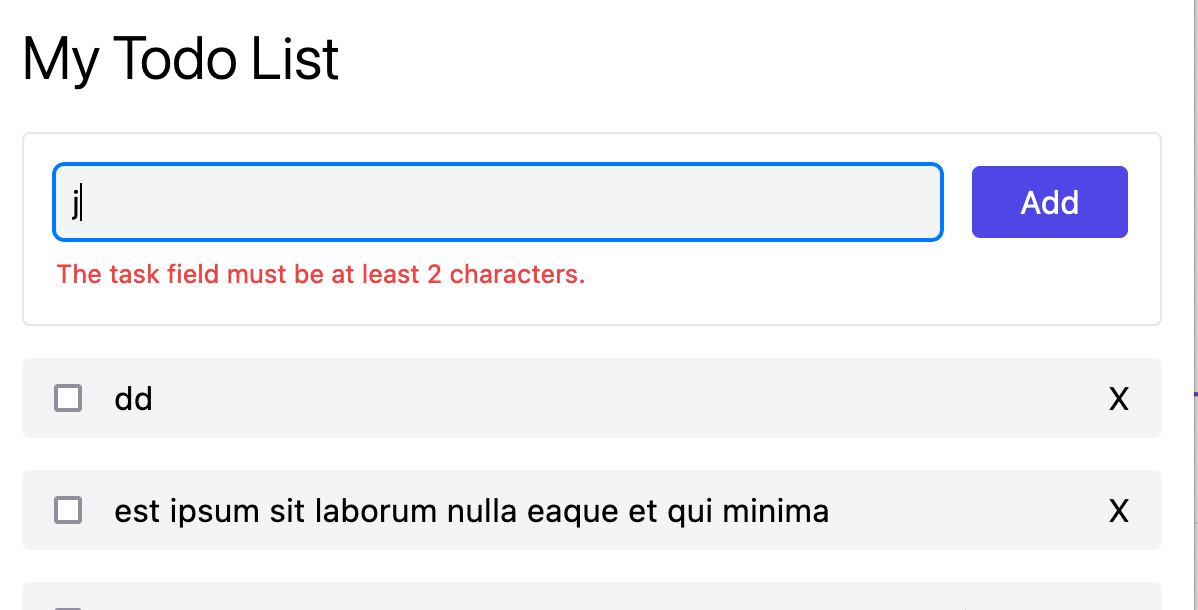
</small>resources/js/Components/AddTodoForm.vue
Now we can see the feedback for the failed validation from the request.
One last thing is adding a little polish to the buttons/input fields. On the form helper there is a processing property that can be used to show that something is happening to the user. For example, disabling a button or input field whilst the form is saving.
This is a quick example below, but it's up to you if you want to apply this throughout.
<button
    class="px-6 py-1.5 bg-indigo-600  rounded text-white disabled:opacity-50"
    :disabled="todoForm.processing"
>
    Add
</button>
resources/js/Components/AddTodoForm.vue
Testing Inertia.js Endpoints
There are a few ways we can add tests to our Inertia.js applications. The first being endpoint tests. With the application involving JavaScript, you may also want to check out browser automation testing (Cypress, Laravel Dusk, etc.) and/or client-side testing (Jest, Mocha, etc.).
Let's flesh out some endpoint tests, which again, Inertia.js gives us a utility helper for. I'll point out now that we will be writing PHPUnit test cases.
Preparing Tests
To run the endpoint tests, you can run them using php artisan test. A fresh Laravel installation will already have an example test for you set up, but this can be deleted.
Create a new test to contain the test cases for the Todo functionality. Then you will find a new file at /tests/Feature/TodoTest.php, with a single test_example() method which you may delete.
$ php artisan make:test TodoTestTest: Listing Todos
As our landing page handles the logic for grabbing the todos, we can make a GET request against the home URL and jump into our assertions.
use App\Models\Todo;
use Illuminate\Foundation\Testing\RefreshDatabase;
use Inertia\Testing\AssertableInertia as Assert;
use Tests\TestCase;

//...

public function test_can_view_todos(): void
{
    // Call the Todo factory to create 10 todos
    Todo::factory(10)->create();

    // Hit the HomeController@index and capture the response
    $response = $this->get('/');

    // Then run through the assertions.
    $response->assertInertia(fn (Assert $page) => $page
        ->component('Home')
        ->has('todos', 10, fn (Assert $todo) => $todo
            ->has('id')
            ->has('task')
            ->has('is_done')
            ->etc()
        )
    );
}
In this test, we are using the assertInertia helper to verify the page returns the 'Home' component. This helper gives us several ways of running assertions against an Inertia response. Read more about this helper in Inertia's documentation.
has asserts the response loads in the data with the respective keys. Note the call to etc() at the end of the chain - this means we don't have to define every key on the Todo model (such as created_at/updated_at, etc.)
Test: Updating/Completing Todos
For our other endpoints, such as the Todo update endpoint. It's back to a more traditional way of testing. Where we call the update endpoint to modify the database record and respectively test that the database has been modified as expected.
public function test_can_complete_todo()
{
    $todo = Todo::factory()->create([
        'is_done' => false,
    ]);

    $response = $this->put(route('todos.update', $todo), [
        'is_done' => true,
    ]);

    $response->assertRedirect('/');
    $this->assertDatabaseHas('todos', [
        'id' => $todo->id,
        'is_done' => true,
    ]);
}
Test: Removing Todos
One final test to test the destroy endpoint. Similar as the previous test, submit as you would usually do to the endpoint and verify the database no longer has that record.
public function test_can_delete_todo()
{
    $todo = Todo::factory()->create();

    $response = $this->delete(route('todos.destroy', $todo));

    $response->assertRedirect('/');
    $this->assertDatabaseMissing('todos', [
        'id' => $todo->id,
    ]);
}
FAQ
Where can I find the Inertia.js documentation?
On the inertia.js website.
Does Inertia.js support server-side rendering?
With some additional setup, yes. You can review their documentation on how to do that here.
Can I use React with Inertia.js?
Yes, review the client-side documentation here.
Can I use Svelte with Inertia.js?
Yes, review the client-side documentation here.
Where can I find the source code for Inertia.js?
Inertia's source code is publically accessible on GitHub.
Can I see a demo of Inertia.js in use?
The guys behind Inertia.js have a demo that you can play with in order to see what Inertia.js is capable of.
Conclusion
We have created a simple todo app using Inertia.js and Laravel and explored some quality-of-life features offered by Inertia. In addition to checking out how we can write PHPUnit tests.
There's a lot more that this library can offer and I highly recommend checking out the documentation for more advanced usage.