Did you know, that you can not only send emails using Mailgun, but you can receive them too?
I'm not talking about the webhooks that can report when a user unsubscribes, an email fails to send, etc... But full-on receiving of emails that are sent to a designated email address.
For this, we will look into using Mailgun's routes and configuring them so that we can receive emails and handle them using our Laravel application. There's also an API where we can retrieve this data by polling, but that's not what we will be attempting in favour of going with an event-driven solution using routes and webhooks.
Now a quick disclaimer. This is written like a tutorial, but I don't want to tell you it is a tutorial either. It's more of a deep dive into how you may set up a feature like this, the tools you would use, and how you would implement it.
If you are looking to implement inbound email capture with Mailgun. Take this as a record of my experience and hopefully, it helps you jump ahead in your own implementation.
Setting Up Mailgun
If you do not have a Mailgun account, the first step is to go ahead and register an account and add a domain. From here on out I will assume you have an account set up, your domain is verified and configured, and are able to send emails from your own application through Mailgun.
Configuring a Receiving Route
Using Mailgun's app interface, we want to visit the "Receiving" area as shown on the navigation on the right.
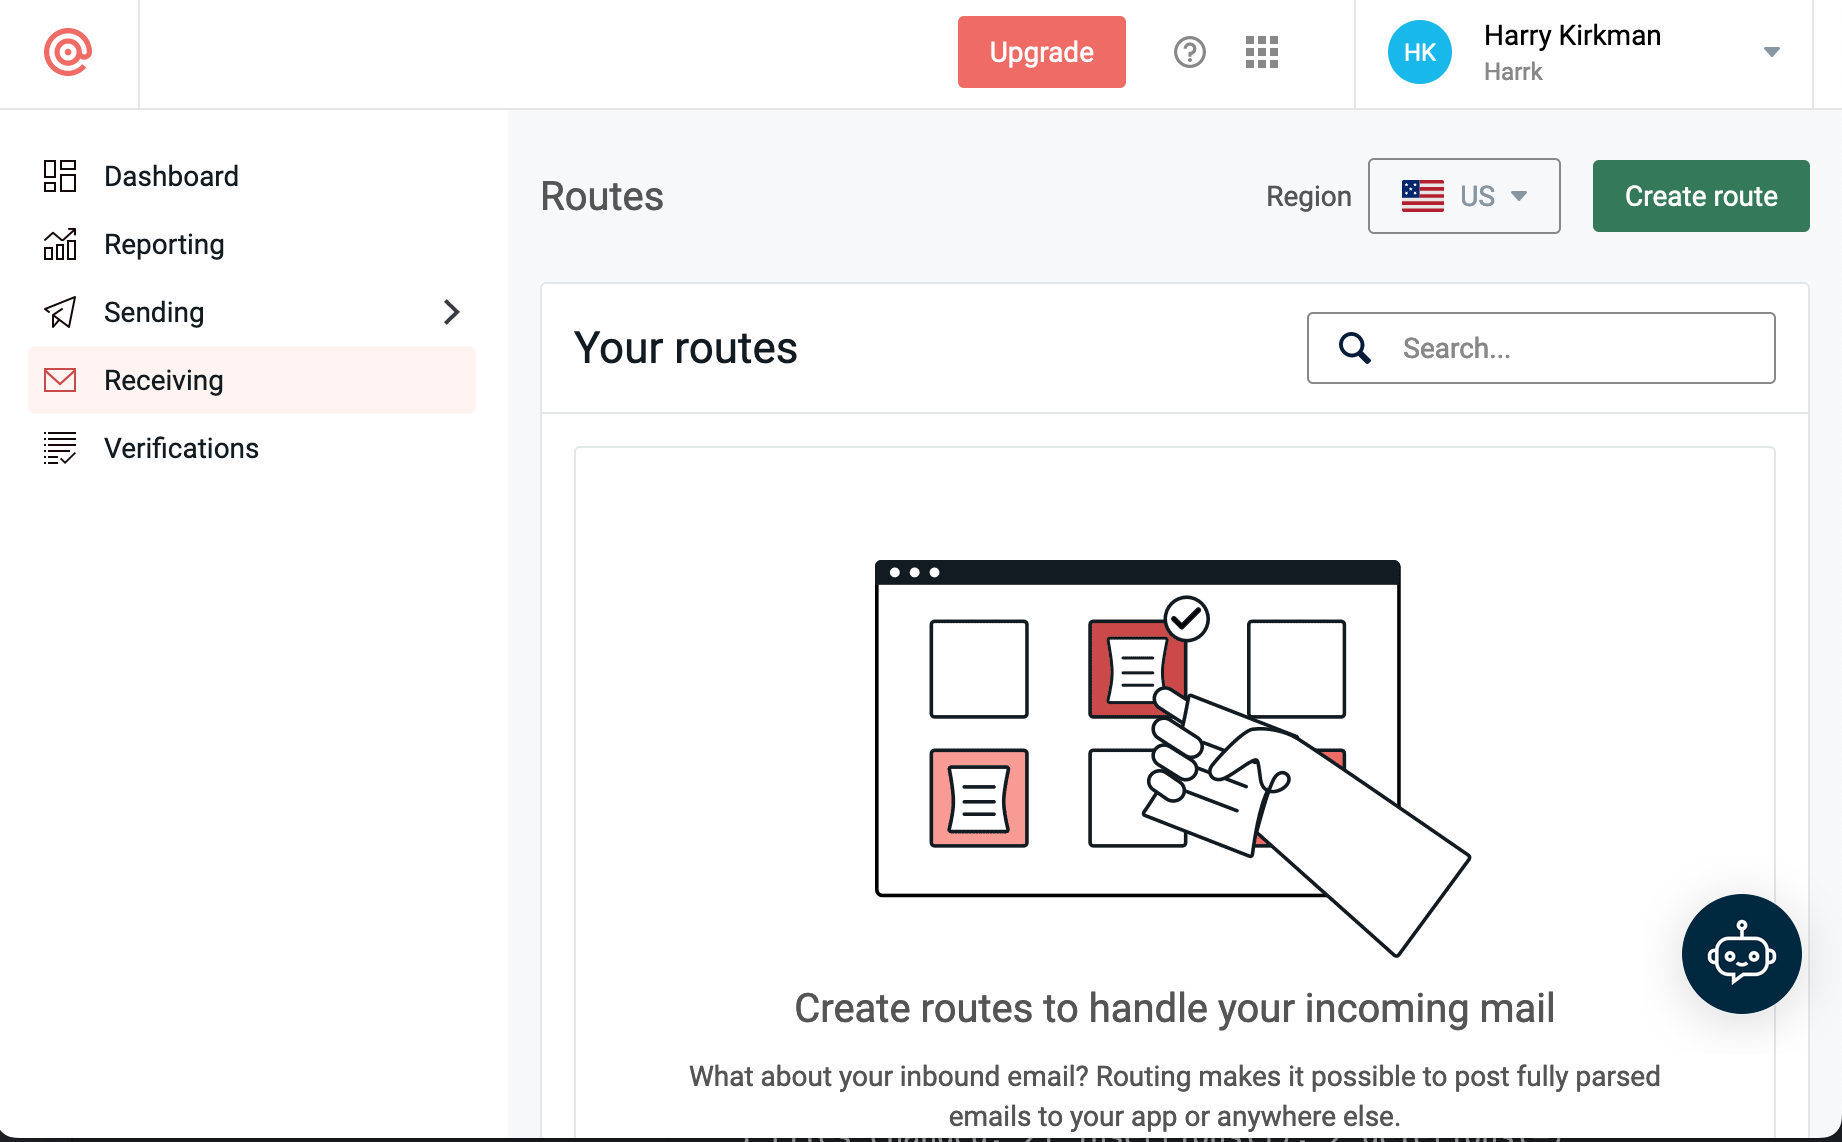
From within here. "Create route" to begin configuring a route we want to catch emails on.
A route in Mailgun consists of 3 components: A filter (when to do something), a priority (in what order), and an action (what to do).
Configuring the Expression Type (Filter)
A filter on a route allows you to check against a few conditions before executing the action of the route. Whether that be forwarded to another email address (ie, your Gmail inbox), or a webhook (such as your Laravel app).
- Catch All: Route will process all inbound emails caught on any of your domains where they have been set up for receiving.
- Custom: For advanced users who require more control. Accepts regex. See documentation.
- Match Header: To match a header name and value
- Match Recipient: To match against the recipient's email address.
This is mostly up to you and your needs. However, for this article, I will use the Match Recipient filter for the purpose of showing this in action.
Option A: Handle all emails with a wildcard
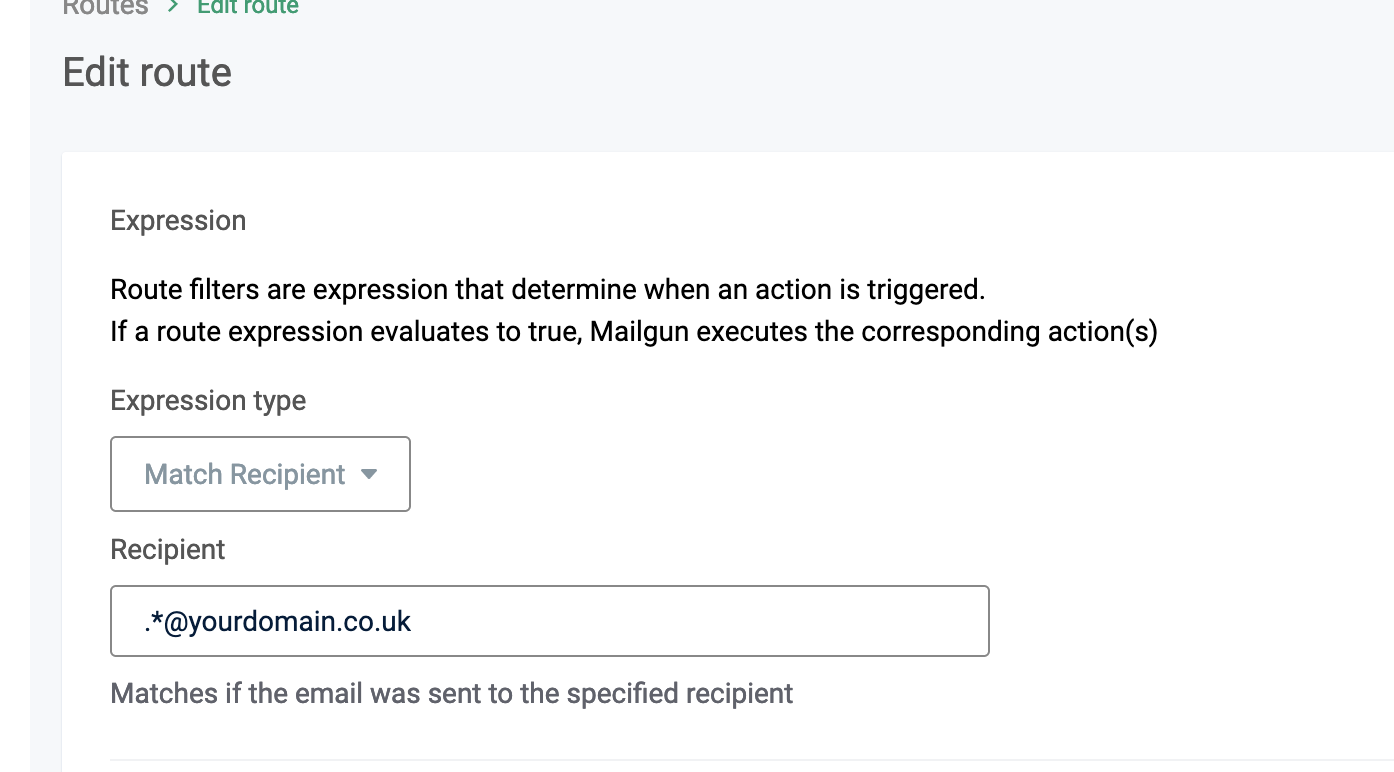
Capture any email sent to any address under your domain using a wildcard regex expression. This would match against these addresses to give an example: [email protected] or [email protected].
.*@yourdomain.comOption B: Handle a specific address

A little bit more strict that the above example if you need to be more specific about the address you want the route to handle.
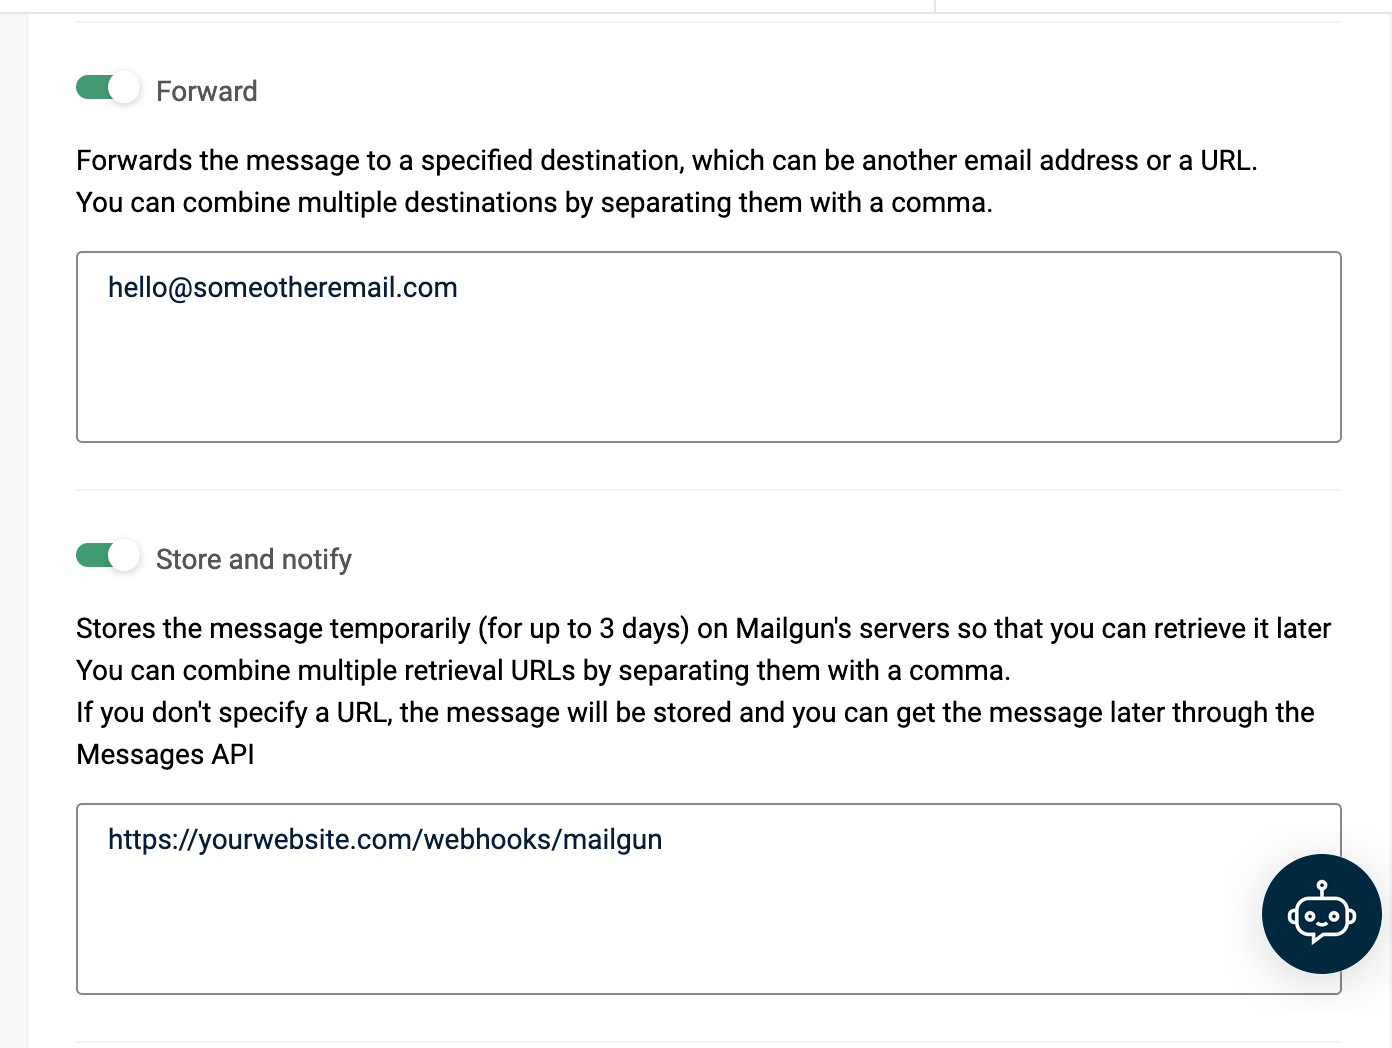
[email protected]Configuring The Action
For the action you have two options, to forward or to store and notify. You can use one or the other, or both, it's up to you.
- Forward: Forwards the email onto another address.
- Store and Notify: This is where you can define your application's endpoint in order to be notified of the incoming email. (The purpose of this article so this is what we will be using.)
Final Route Configuration
There's two options left, Stop and Priority. You can go ahead and leave these alone. However, if you have multiple matching routes then they'll be handled in the order of priority and "Stop" will determine if it stops at this route or carries on.
Otherwise, go ahead and save the route.
Setting Up The Project
With the Mailgun configuration all out of the way. It's time to get a Laravel project set up.
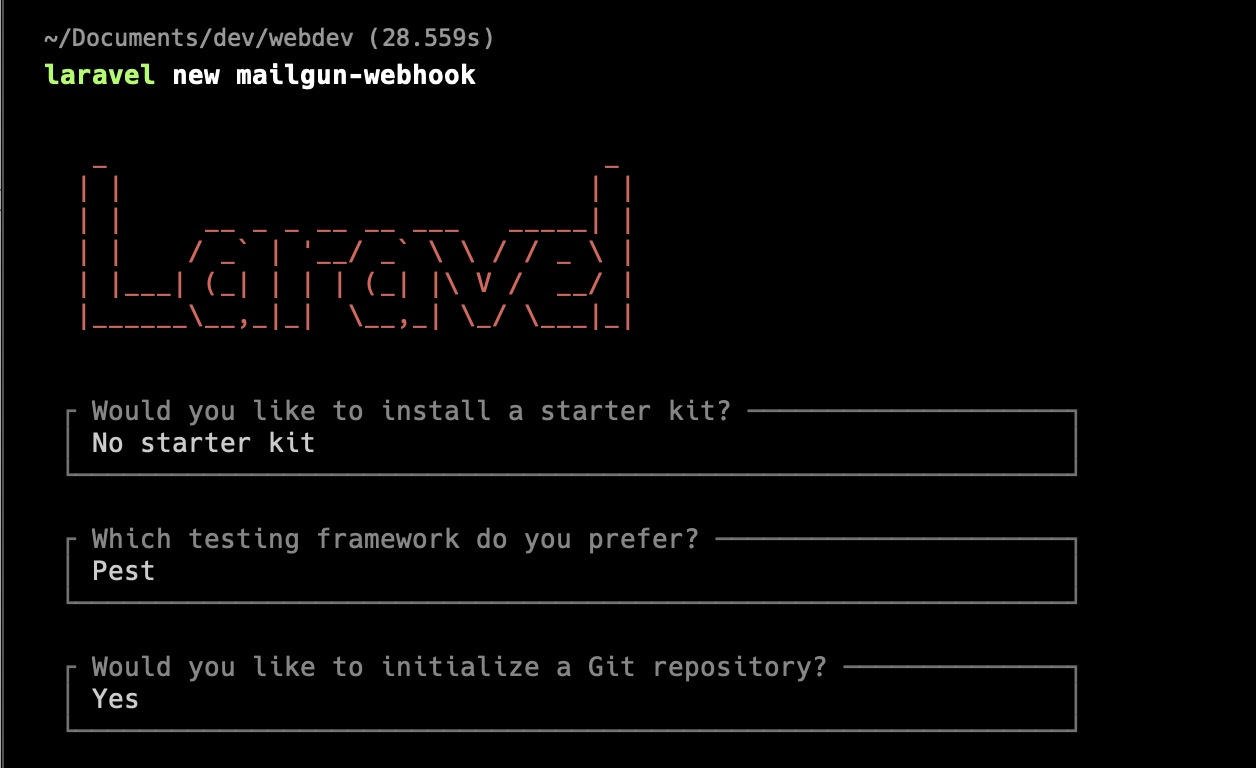
Start with a new Laravel project (or skip if you're using an existing one).
$ laravel new mailgun-webhooksWe don't need anything fancy for this, so no starter kits like Breeze or Jetstream are necessary.
Generate a controller using artisan which we'll then wire up in a moment for our webhook.
$ php artisan make:controller MailgunWebhookController -iAnd in routes/web.php ensure the webhook we defined will hit the controller.
<?php

use App\Http\Controllers\WebhookMailgunController;
use Illuminate\Support\Facades\Route;

Route::post('/webhooks/mailgun', WebhookMailgunController::class);
web/routes.php
One last thing before we move on. We want to exclude the webhooks route from requiring a CSRF token. You can do this by adding webhooks/* to th eVerifyCsrfToken middleware.
class VerifyCsrfToken extends Middleware
{
    protected $except = [
        'webhooks/*'
    ];
}
app/Http/Middleware/VerifyCsrfToken.php
That's the scaffolding taken care of, so let's now move onto the fun stuff.
Verifying It's All Talking
Let's confirm everything is set up by doing a dd() in the controller we created.
public function __invoke(Request $request)
{
    dd($request->all());
}
app/Http/Controllers/WebhookMailgunController.php
Send an email to the email you have configured a route for in Mailgun. Be patient, it can take a minute or two for this to go through all the pipes.
Since I am using expose.dev to share my local with Mailgun, I can see the request has come in. The even better thing is that I can now reuse the request and "Replay" without the need to send another email. Convinient!
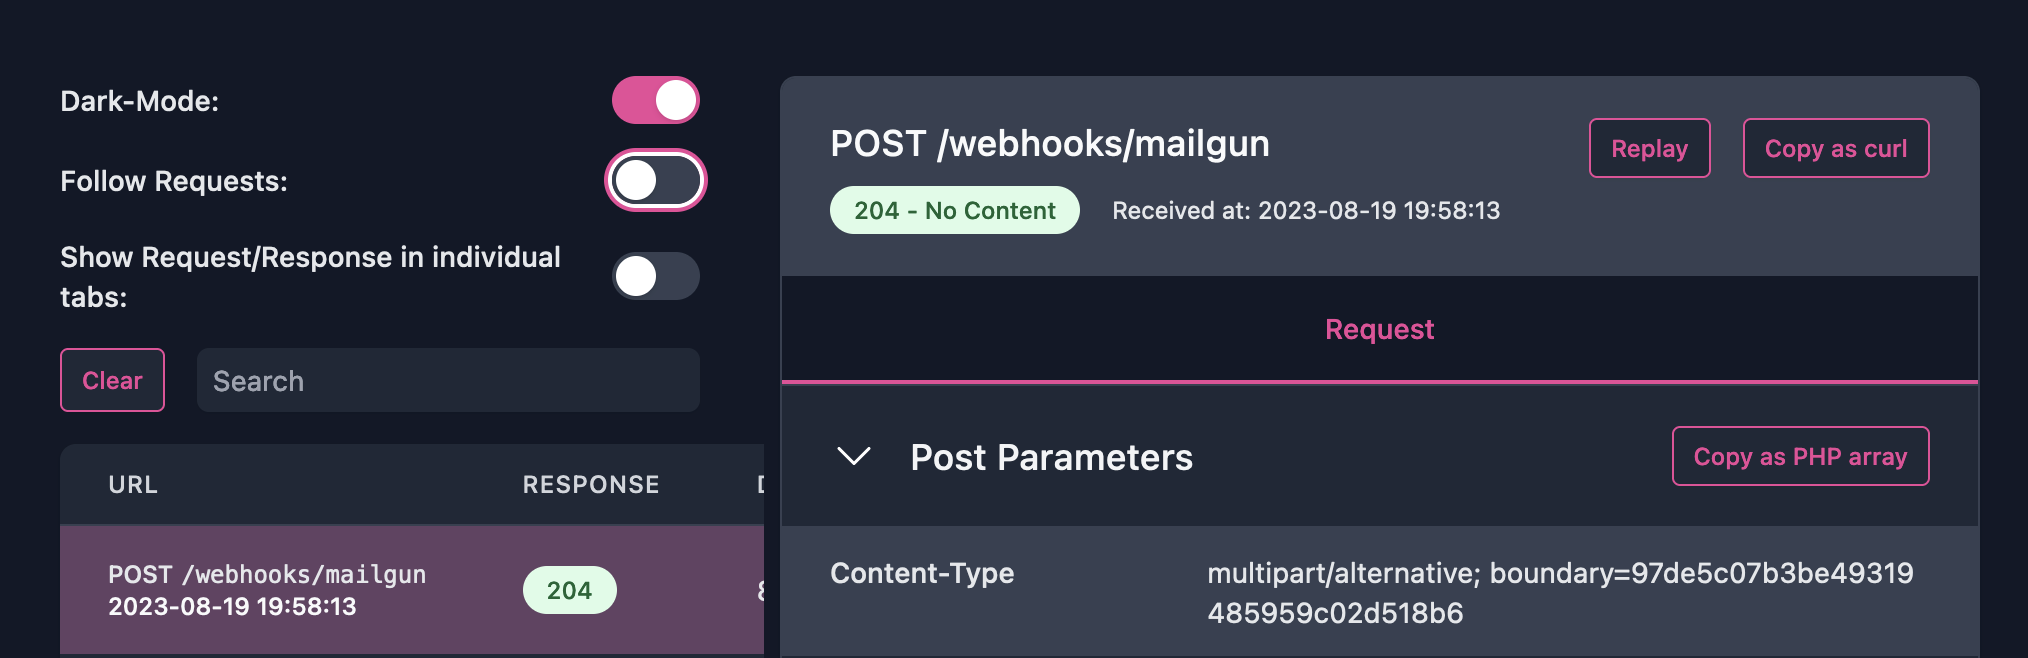
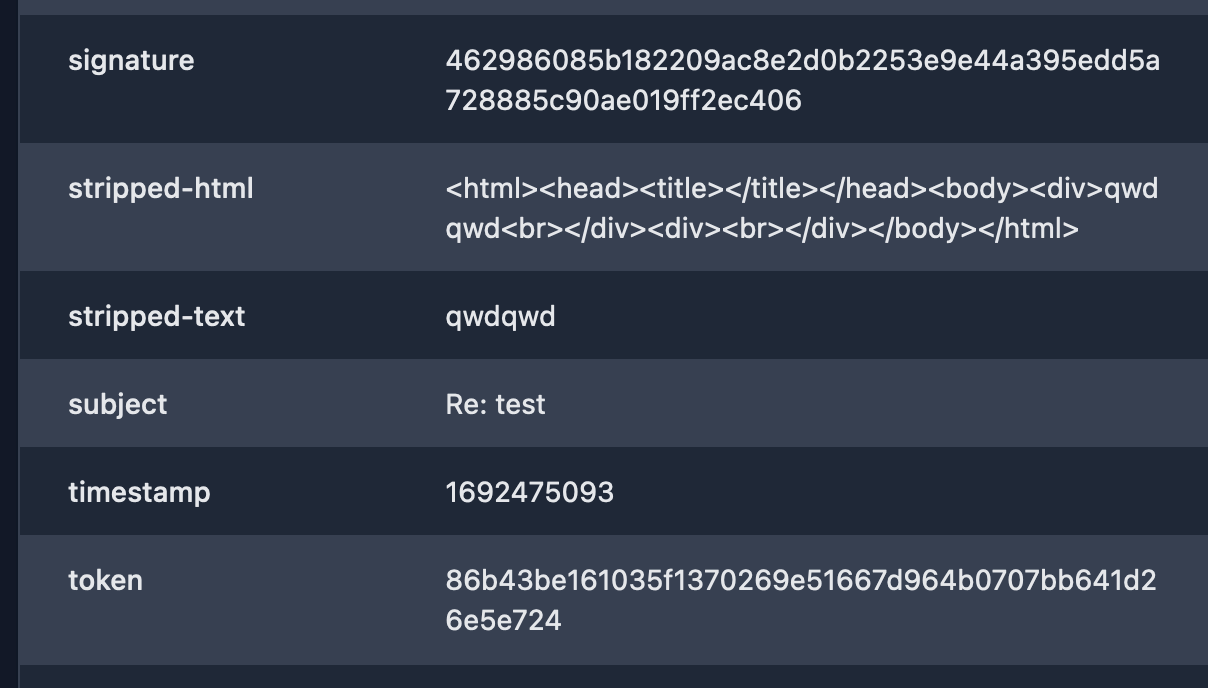
Checking in the response, again by using expose's dashboard for this and I can see the dd() output with everything Mailgun is sending over:
Review Mailgun's documentation for retrieving messages to see the full structure of the request.
Handling the Inbound Email Request
Okay, does everything check out? Good!
If not, check out the FAQ below for some troubleshooting help.
The actual logic of this will depend mostly on you and your application. However, I'll go over a few examples and then it's over to you to implement it in the way you see fit.
Extracting the Sender/From Address
There's two fields that give you access to the sender; sender and from. A small code example below gives an example of how these two differ.
public function __invoke(Request $request)
{
    $sender = $request->input('sender'); // [email protected]
    $from = $request->input('from'); // Somebody <[email protected]>

    // ...
app/Http/Controllers/WebhookMailgunController.php
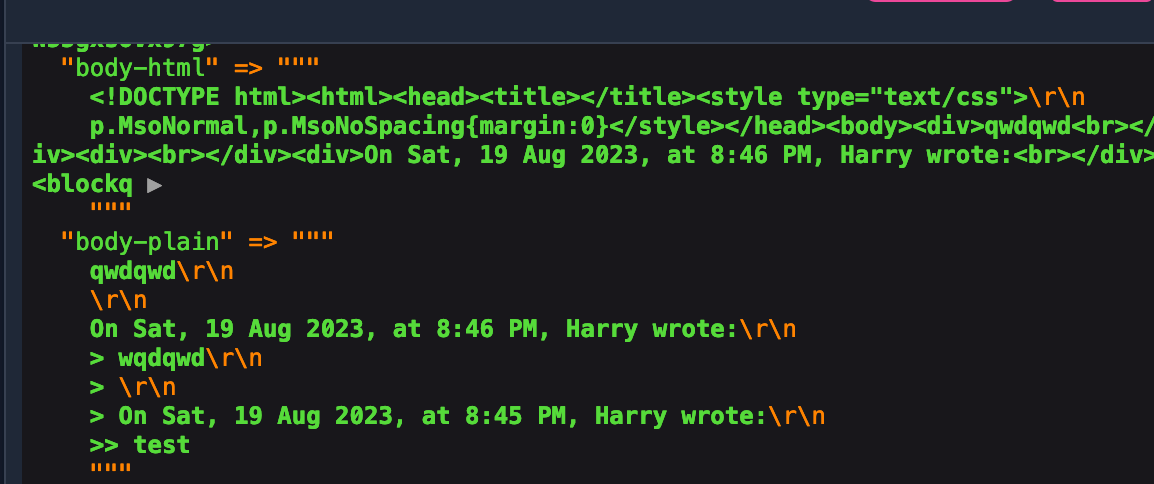
Extracting the Body (HTML or Plain)
Extracting the desired message out of the body can be confusing at first. But Mailgun just gives you a few options to work with.
// Returns the full email in the respective formats:
$bodyPlain = $request->input('body-plain');
$bodyHtml = $request->input('body-html');

// Mailgun's attempt at stripping out footers and quoted parts (ie, nested emails). Not perfect.
$strippedBodyText = $request->input('stripped-text');
$strippedBodyHtml = $request->input('stripped-html');
app/Http/Controllers/WebhookMailgunController.php
Extracting Email Attachments
If attachments are present, they are included in the attachments parameter as a JSON string. When decoded you will have an array of all attachments in the following structure:
| size | integer | indicates the size of the attachment in bytes. |
| url | string | contains the url where the attachment can be found. This does not support DELETE. |
| name | string | the name of the attachment |
| content-type | string | the content type of the attachment |
However, you will not be able to download the files directly as accessing these require you to provide authentication credentials. Worry not - pass in your domain name and secret for the credentials.
Here's an example of how we can process the attachments from an incoming email:
if ($request->has('attachments')) {
    $attachments = collect(json_decode($request->input('attachments'), true));

    // loop through each attachment and save them on the local filesystem.
    $attachments->each(function ($attachment) {
        $fileContents = Http::withBasicAuth(
            config('services.mailgun.domain'),
            config('services.mailgun.secret')
        )->get(Arr::get($attachment, 'url'));

        Storage::disk('local')->put(Arr::get($attachment, 'name'), $fileContents);
    });
}
app/Http/Controllers/WebhookMailgunController.php
Securing the Webhook
As your webhook is open to the world, this means that any rogue person can stumble on your endpoint and start causing all kinds of trouble.
To help you prevent this, Mailgun provides 3 key pieces of data with each request. A signature, timestamp, and token.
It is then up to you to generate a signature on the application side and compare it with the provided signature via the request. If they don't match, there's an issue and you shouldn't process it further.
To validate the signature, take the timestamp from the request and append it with token. Run this through hash_hmac with the sha256 algo, and your secret key for signing.
$passes = hash_hmac(
    algo: 'sha256',
    data: $timestamp.$token,
    key: config('services.mailgun.secret'),
) === $expectedSignature;
Check out Mailgun's documentation on the subject for more information.
FAQ
Why isn't Mailgun hitting my webhook?
It could be a number of things, unfortunately, but check out the following:
1) Ensure the Mailgun route is configured correctly. You can test if the rule is applying the way you expect by testing your route. And secondly, ensure you have a valid endpoint configured that Mailgun is allowed to access.
2) If using a tunnel, ngrok / expose both have a dashboard you can use to see if anything is hitting your application. If nothing is logging here, then it's a setup issue with your domain/Mailgun. Otherwise, follow the error code if you have one.
3) Check your email for any failed/bounced email errors. My provider sends me an email back to let me know if the recipient could not be found.
4) Check your domain's logs inside Mailgun. The logs record both sending and receiving events and more info can be found here for any error codes.
Conclusion
I hope this article has helped you with your own implementation, or gives you an idea of the challenges you may face.
There are many steps that depend on your own configuration and requirements, but if there is anything you feel could be explored further. Feel free to leave a comment below!
Otherwise, check out Mailgun's documentation. It's quite extensive and broken into user guides and API references.